
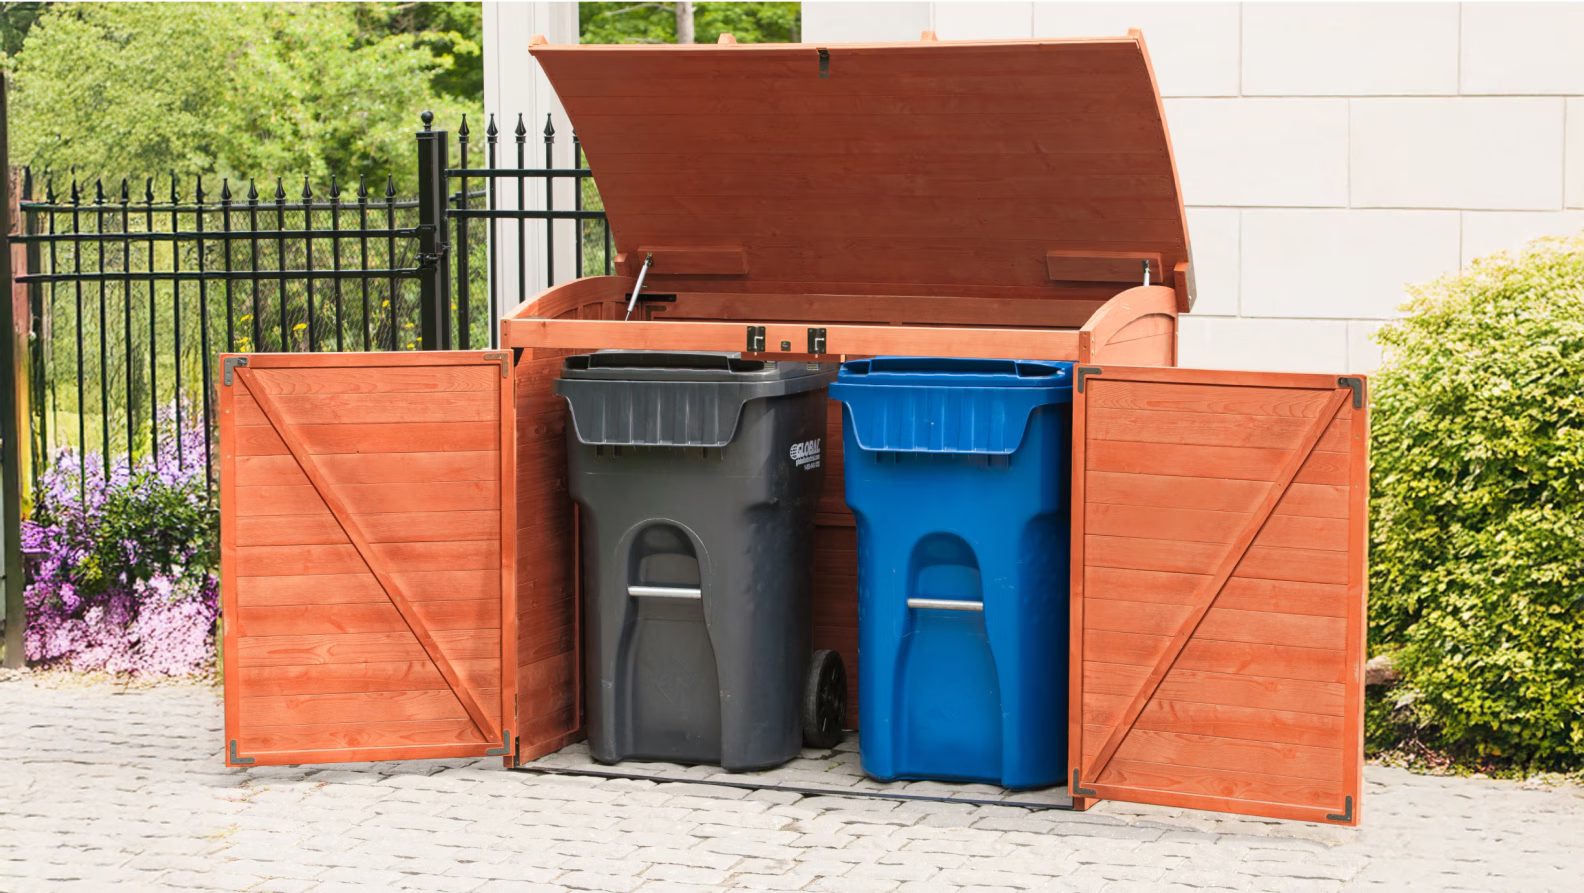
Every house seems to have one. That narrow gap between the side wall and the boundary fence, where the wheelie bins live next to forgotten tins of paint and half a bag of compost from 2019. Nobody plans to let it get messy, but the bins get rained on, the lids catch the wind, and before long the whole thing looks grim from the garden gate.
Put a covered recycling station in that space and the problem goes away. Your bins dry out, your recycling stays sorted, visitors stop pretending they didn’t notice the state of things, and bin day becomes a lot less annoying. You won’t need any specialist skills to get it done, either. Below, we’ll walk through the frame, the roof, the layout inside and a few tricks that’ll actually make that dead strip of concrete pull its weight.
Measure the Space Before You Buy Anything
Side returns come in all sizes. Some barely hit 900mm across, while others give you a comfortable 1.5 metres of width. Before you even think about buying timber, grab a tape measure and write down the width, the depth and how much headroom you’ve got. Each row of bins will need roughly 600mm of depth if you’re lining them up front to back, and you’ll also want a sloped roof that clears the tallest bin with room to spare.
Have a look at any guttering or downpipes running along the house wall, and check the fence height too. Both of those will affect where your uprights can go and which direction you angle the roof for drainage.
Build a Simple Timber Frame
Treated timber is the obvious choice here. For the uprights, 50mm x 50mm posts will do the job, and 50mm x 25mm battens across the top can support the roof panel. Screw or bolt one side of the frame into the house wall and fix the other side to the boundary wall or fence. Can’t drill into the fence? Sink two posts into the ground with postcrete instead.
Leave the front open, or hang a hinged panel so you can wheel the bins out on collection day without wrestling them past each other. People build these too tight all the time and then can’t get the bins in or out, so allow at least 50mm of clearance either side of each bin.
Pick the Right Roofing Material
This is the part that’ll decide whether the whole thing works or falls apart after a year. You need a material that handles rain, lets some light in, won’t crack the first time the temperature drops, and doesn’t weigh a tonne. A polycarbonate roofing sheet will cover all of that and more. It’s light enough to sit on a basic timber frame without any extra bracing, it comes in clear or opal finishes, and the twinwall versions add a bit of insulation without piling on weight. Cut it to size with a fine-toothed saw and fix it down using roofing screws with rubber washers.
Angle the roof away from the house wall at a minimum pitch of 5 degrees so rainwater runs off towards the boundary side. If you want to stop water pooling on the path below, fit a short length of gutter along the lower edge.
Separate Your Waste Streams
With the structure standing, turn your attention to what goes where inside it. Most councils hand out three or four different bins, and squeezing them all into a single row almost never works well. Fit a shelf above the main bins for smaller caddies like food waste and battery boxes. Wall-mounted hooks can hold bags, and a quick label on each bin will stop everyone in the house opening the wrong lid to check which one takes cardboard.
If you’ve got the width, stagger the bins so you can pull any one of them out without moving the others first. That sounds minor, but it makes a real difference on collection morning when you’re half awake and it’s raining. A strip of old carpet or rubber matting on the floor will also stop the bins sliding around every time you drag one out, and it’ll cut down on that awful scraping noise on the concrete.
The Easiest Build You’ll Do All Year
Building a covered recycling station costs next to nothing and takes a weekend at the absolute most. Your bins will stay dry, your recycling won’t blow around the alley, and that wasted strip down the side of the house will finally do something useful instead of collecting cobwebs and spiders.
It also makes a bigger difference than you’d expect to how the front of your house looks. Bins visible from the street or the garden path drag the whole place down, and tucking them under a neat timber and polycarbonate cover tidies that up instantly. If you’ve been putting it off, just pick a weekend and get on with it. The hardest part is measuring up. Everything after that is screws, battens, and a roof panel.












Leave a Reply